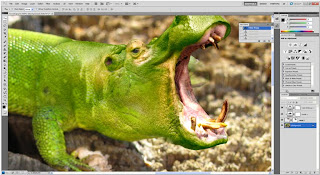
This was the back ground image we worked up from.
Today we where given a totorial in mergeing two pictures together makeing them look inplace on one another, we hot 2 images a hippos head and a lizard. we used the lizard as a back ground and put the hippos head in another layer and worked it into blending with the main image of the lizard . Use free transform, and then shift to move it at the same scale/proportion, then move over the head of the lizard I added an adjustment layer of colour balance.
Using a mask I deleted the removed and faded parts of the hippo’s head to make it look more natural and in place.
Changing the opacity effected how strong the brush was
Using the stamp tool I covered over the nose with a section of the back ground. Which covered up the lizard’s nose, covering it with a background
over all ithnk that is came out as well as i wanted because it looks all like one picture not loads of diffrent parts stuck onto a lizard.
this has also helped to progress my photoshop skills and i feel more confident useing masks and adjustment layers.


No comments:
Post a Comment